How to Use Advanced Intrusion Detection Environment (AIDE) to monitor changes in Linux
System integrity is put at risk when configuration files are deleted or modified without authorization or careful supervision. How can a change to an important file or directory be detected? This problem is solved by using AIDE.
AIDE (Advanced Intrusion Detection Environment) is a file and directory integrity checker. It creates a database from the regular expression rules that it finds from the config file(s). Once this database is initialized it can be used to verify the integrity of the files. It has several message digest algorithms that are used to check the integrity of the file. All of the usual file attributes can also be checked for inconsistencies. I am going to demonstrate how AIDE can be used to monitor the changes in Linux.
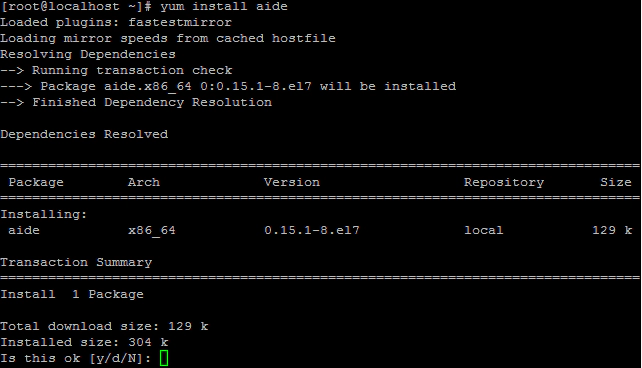
To configure AIDE, you need to install the AIDE package into your server. install the package using yum or rpm commands.
Once the software is installed, it needs to be configured. The /etc/aide.conf file is the primary configuration file for AIDE. it has 3 types of configuration directives:
- configuration lines
- selection lines
- macro lines
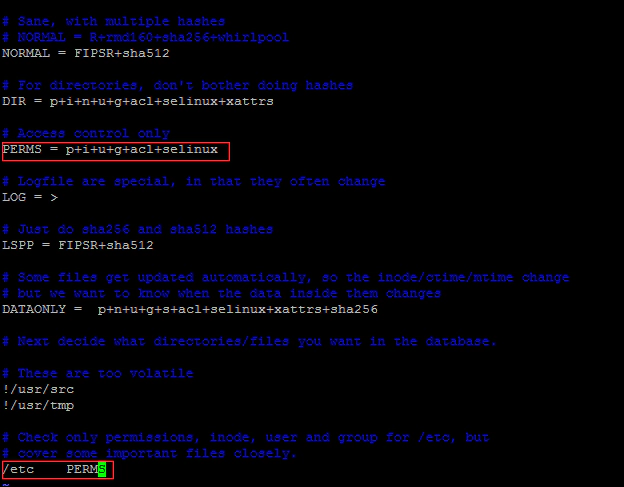
Configuration lines take the form, param=value. when param is not a build-in AIDE setting. Then this is a group definition that lists which changes to look for. For example, the following group definition can be found in the /etc/aide.conf installed by default.
PERMS = p+i+u+g+acl+selinux
The line above defines a group called PERMS that looks for changes in the file permission(p), inode (i), user ownership (u), group ownership (g), ACLs (acl), or SELinux context (selinux).
Selection lines define which checks are performed on matched directories. The following lines are examples of selection lines:
/dir1 group
=/dir2 group
!/dir3 group
The first line performs the group of checks on /dir1 and all of the files and directories below it. The second line performs the group checks specified on /dir2. The equal sign specifies the check is to be done the directory only and does not recurse below it. The third line in the example above excludes /dir3 and all of the files below it from any checks.
The third type of directives are macro lines. They define variables and their definition has the following syntax:
@@define VAR value
@@{VAR} is the reference to the macro defined above.
Now let us configure the AIDE to monitor change. For making it simple, I just removed a few lines from the aide.conf. I just want to monitor only the changes in /etc directory. That’s my requirement for now.
Execute the aide –init command to initialize the AIDE database. AIDE will scan the file system and record all of the current information about the files and directories specified in the /etc/aide.conf configuration file.
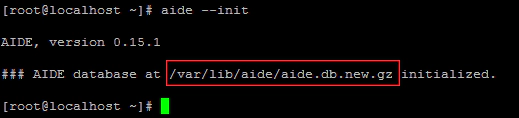
The above command create the database in a file called /var/lib/aide/aide.db.new.gz. This file has to be renamed to /var/lib/aide/aide.db.gz because this is where AIDE expects the database to be when performing file system checks. It is recommended to copy /var/lib/aide/aide.db.gz to another system or location, as this is the reference file that is used to check the changes.

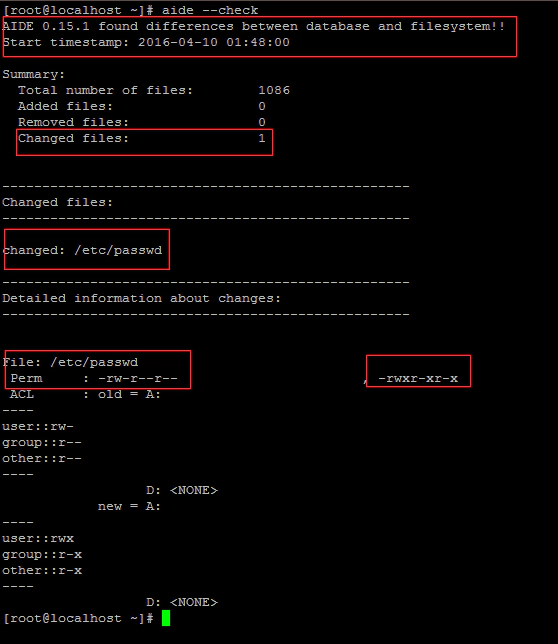
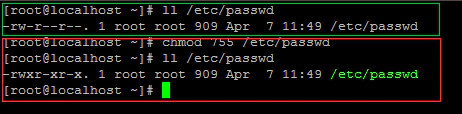
To check how the AIDE track and monitor the changes. lets change the permission of /etc/passwd file and check how AIDE check.
Now let’s check the changes using the following command. aide –check this will check the current permission in the system with the recorded permission in the AIDE database file. You could see that AIDE found a difference between database and filesystem, and it also tells you what changes have been done and what was the original permission. It’s pretty useful right, Now we don’t have to break our heads or check with a similar system to know what the original permission associated with this file.